In this tutorial, we'll show you how to deploy the Broadleaf Demo to Amazon Elastic Beanstalk. If you don't have the Broadleaf Demo already built and ready to go, please follow the Getting Started tutorial first.
Create an Amazon RDS Instance
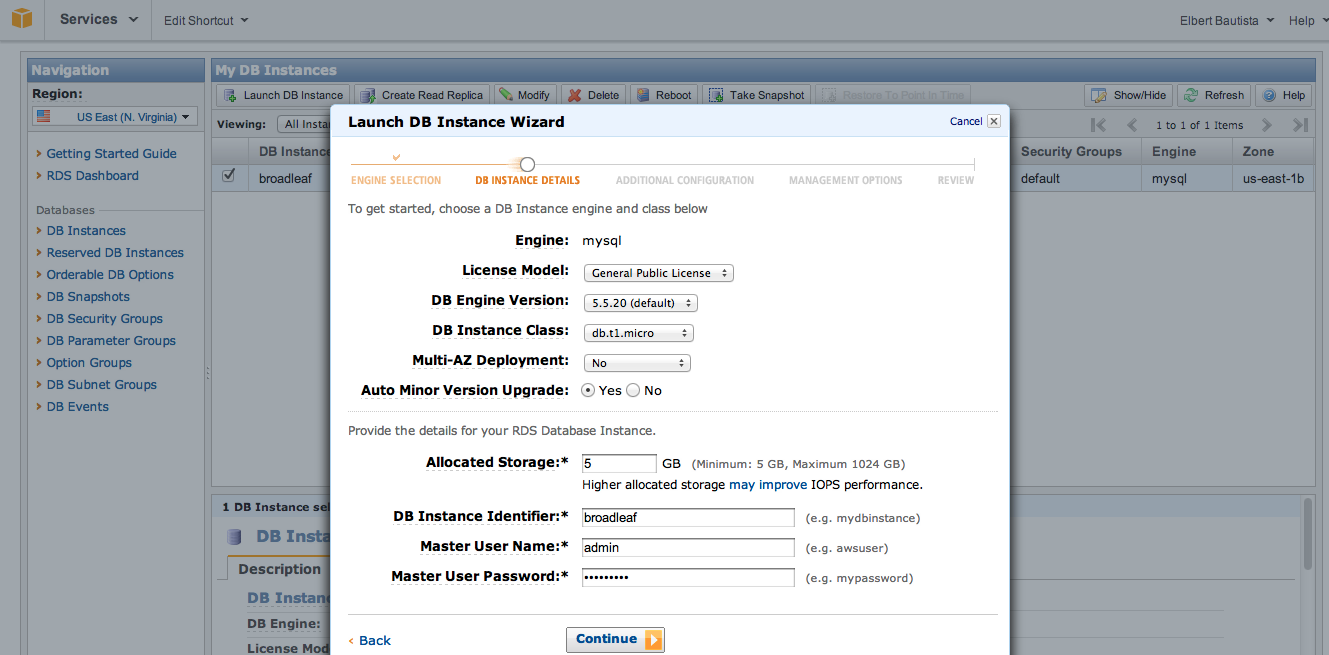
We will begin by creating a MySql Database instance through the AWS console. Launch the DB Instance Wizard, and create a MySql 5 database with the following properties:
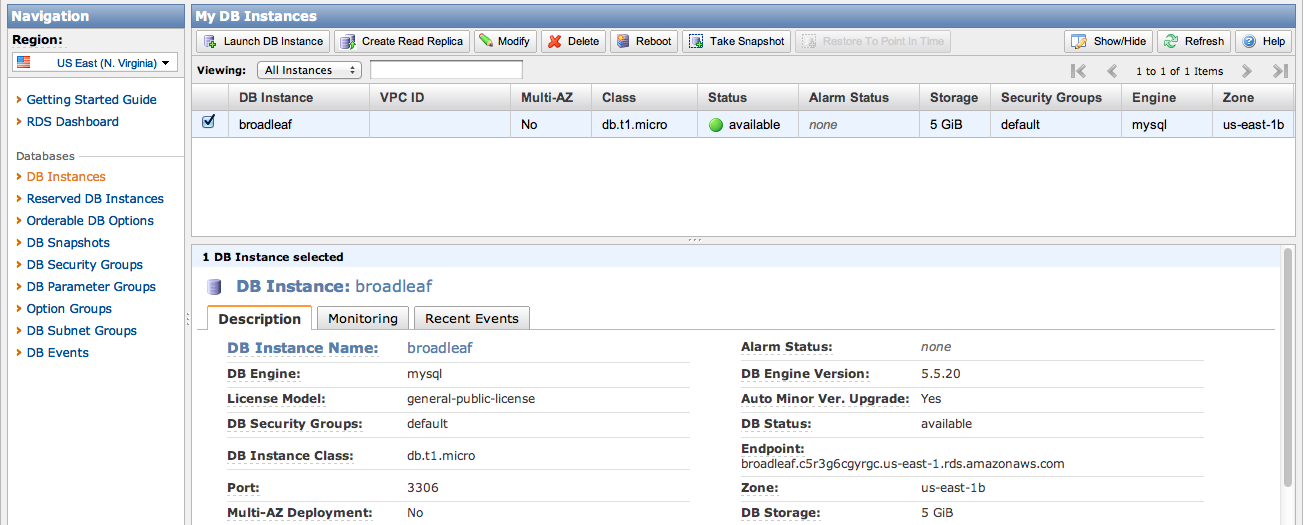
You should see the instance start up, and then note the endpoint of your database.
Modify the Demo Application to use MySql
For this tutorial, we will be using the MySql 5.1.20 connector. So, go ahead and download the latest connector and place that jar into your WEB-INF/lib directory.
Next, modify common-shared.properties to use the MySql Dialect
blPU.hibernate.dialect=org.hibernate.dialect.MySQLDialect
blCMSStorage.hibernate.dialect=org.hibernate.dialect.MySQLDialect
blSecurePU.hibernate.dialect=org.hibernate.dialect.MySQLDialect
Modify the root POM to add the MySql dependency
<dependency>
    <groupId>mysql</groupId>
    <artifactId>mysql-connector-java</artifactId>
    <version>5.1.20</version>
    <scope>runtime</scope>
</dependency>
Make sure to add the dependencies to your Site POM as well
<dependency>
    <groupId>mysql</groupId>
    <artifactId>mysql-connector-java</artifactId>
</dependency>
Modify the applicationContext-dataSource.xml to point to your Amazon RDS instance -- note: For ease of this tutorial, we will use bean definitions instead of JNDI lookups.
<bean id="webDS" class="org.apache.commons.dbcp.BasicDataSource" destroy-method="close">
    <property name="driverClassName" value="com.mysql.jdbc.Driver" />
    <property name="url" value="jdbc:mysql://myinstance.c5r3g6cgyrgc.us-east-1.rds.amazonaws.com:3306/broadleaf" />
    <property name="username" value="myusername" />
    <property name="password" value="mypassword" />
</bean>

<bean id="webSecureDS" class="org.apache.commons.dbcp.BasicDataSource" destroy-method="close">
    <property name="driverClassName" value="com.mysql.jdbc.Driver" />
    <property name="url" value="jdbc:mysql://myinstance.c5r3g6cgyrgc.us-east-1.rds.amazonaws.com:3306/broadleaf" />
    <property name="username" value="myusername" />
    <property name="password" value="mypassword" />
</bean>

<bean id="webStorageDS" class="org.apache.commons.dbcp.BasicDataSource" destroy-method="close">
    <property name="driverClassName" value="com.mysql.jdbc.Driver" />
    <property name="url" value="jdbc:mysql://myinstance.c5r3g6cgyrgc.us-east-1.rds.amazonaws.com:3306/broadleaf" />
    <property name="username" value="myusername" />
    <property name="password" value="mypassword" />
</bean>
Deploy to AWS
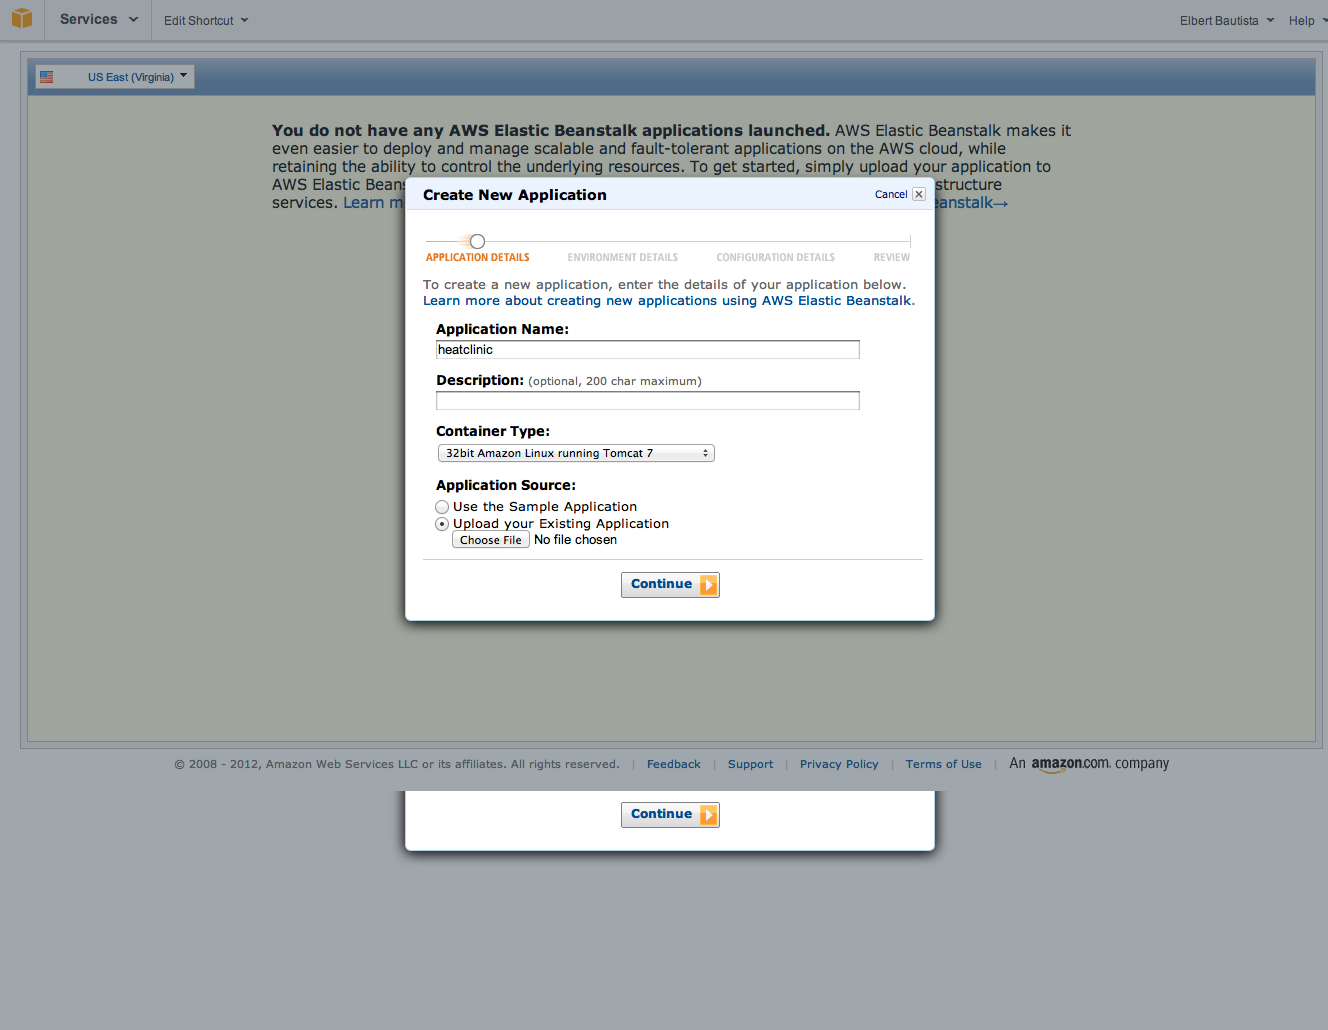
Rebuild the Demo Application and upload site.war to Amazon Elastic Beanstalk
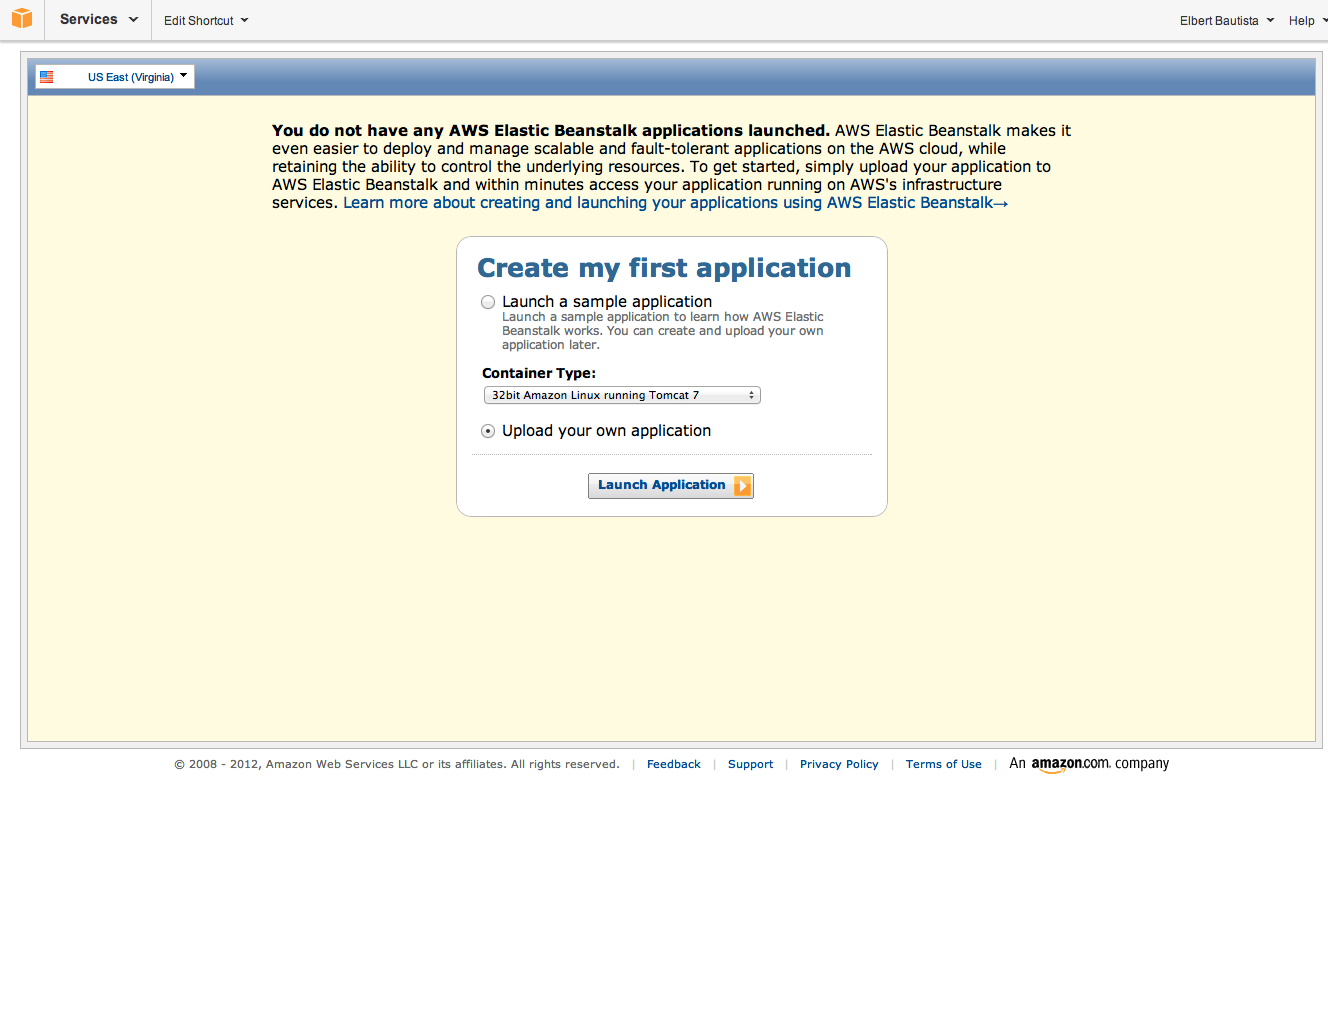
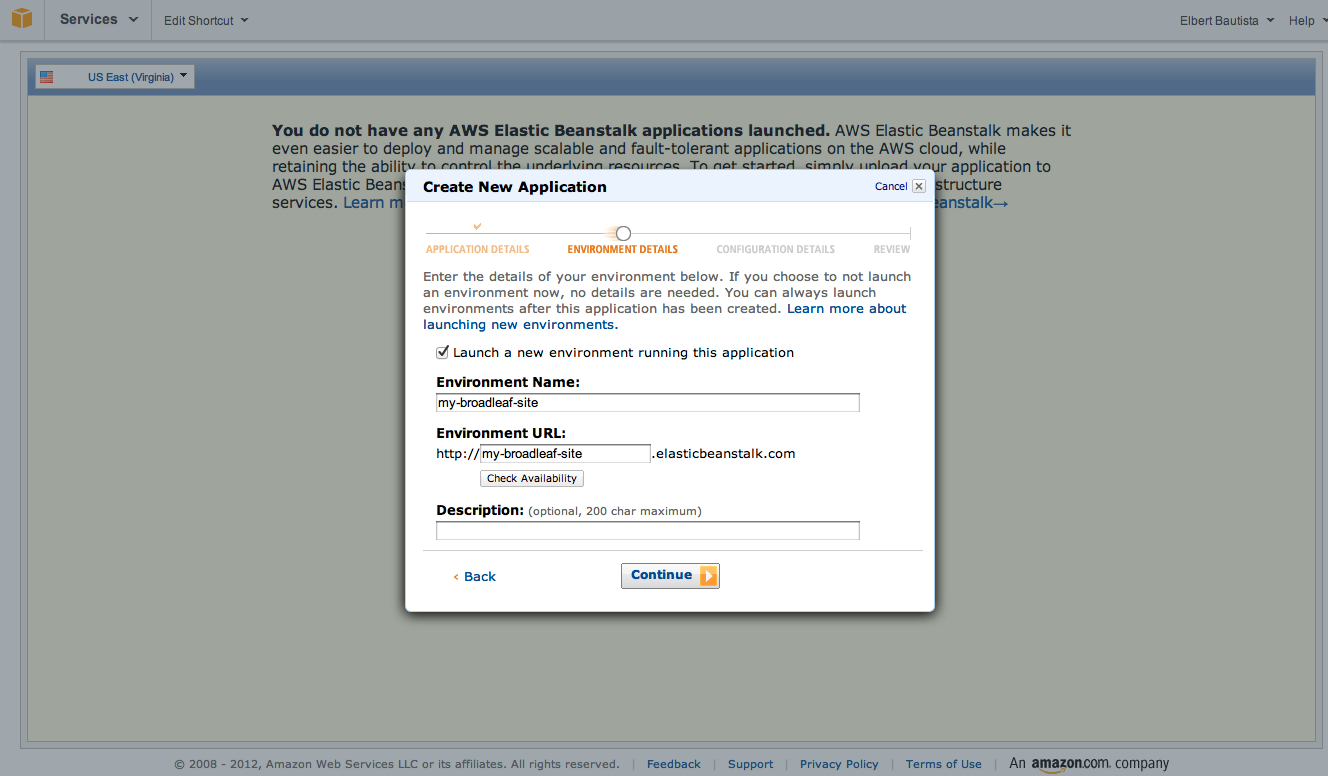
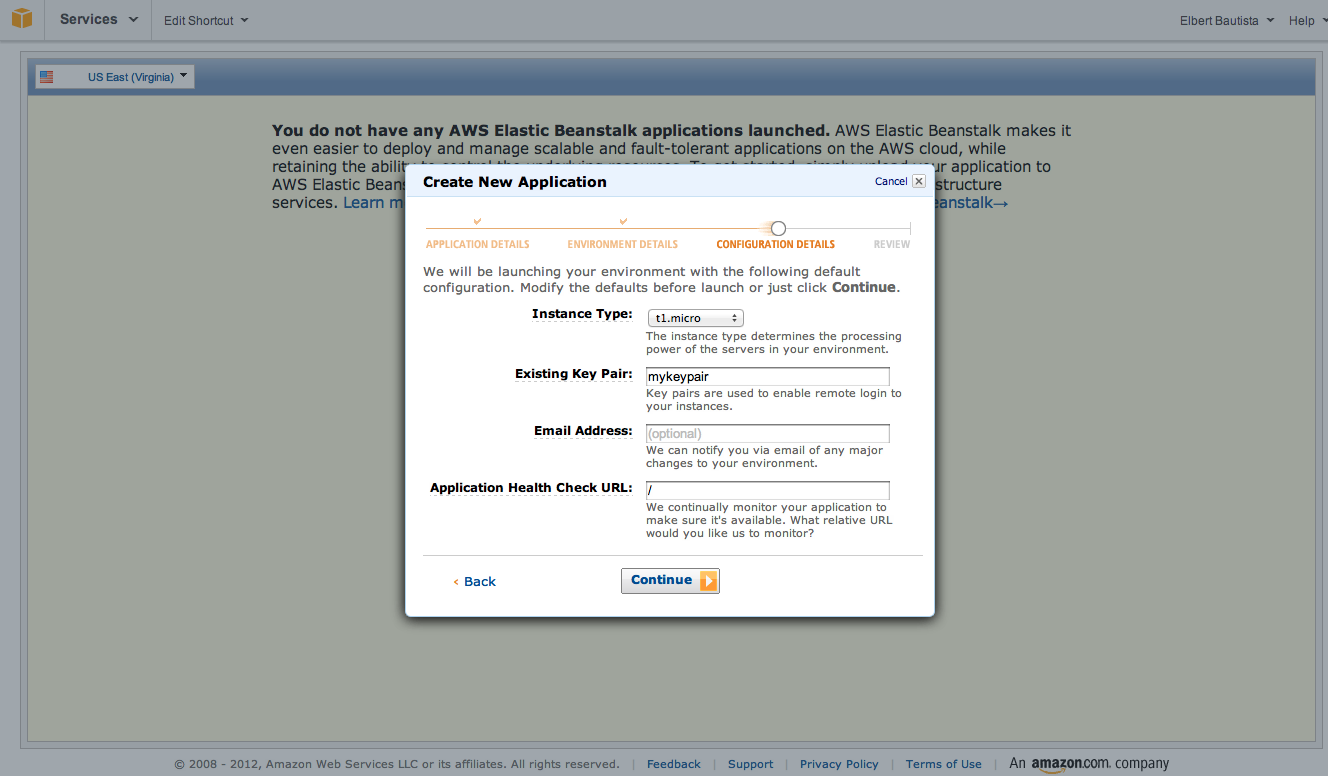
Launch the Elastic Beanstalk Wizard, and choose the 32-bit Amazon Tomcat 7 instance
Follow the steps to create your new instance. You will want to create a public/private key pair in order to SSH into your instance. Follow the generating a KeyPair tutorial to learn how to do so.
SSH into your instance
You can SSH into your instance using the following user: ec2-user For example:
ssh -i ~/.ec2/blc-mykeypair.pem ec2-user@ec2-12-34-567-890.compute-1.amazonaws.com
By default, AWS Elastic Beanstalk log output from Tomcat is written to/opt/tomcat7/logs/tail_catalina.out (depending on your version of tomcat)
