Given the proliferation of the micro-services architecture and the standardization of containerization within many projects, the testing landscape has become increasingly more complex, but even more important than ever. In this tutorial, we’ll be utilizing the TestContainers library (in a JUnit context) to demonstrate black box functional UI acceptance testing across a multi-container Docker project and produce video recording of the browser tests for review.
The main goal of this post is to go over the mechanics and configurations necessary to facilitate testing across these isolated containers. If you haven’t heard about TestContainers, I would highly recommend taking a look to get a deep dive into all the capabilities that this library offers.
For this particular example, we’ll mimic testing a multi-container docker environment that consists of three different containers, each responsible for different things.
Quick Note: This tutorial assumes you have some basic knowledge of Java, Spring, and Docker (but not all completely necessary) and have the following installed on your machine: Java and Docker
- To simulate our target “black box” test container, we’ll just use a very popular public docker image, in this case Wordpress
- A MySQL container for the purposes of the Wordpress instance
- A Docker Selenium “standalone” container in which to execute the functional test
Initial Project and Spring Boot JUnit Test Setup
The easiest way to get started - is to follow along with your own sample project that you can create from scratch. For this sample, we’ll just create a simple Spring Boot Testing Harness using Spring Initializer here.
Go ahead and create a Maven project given values similar to the ones below and click “generate”.
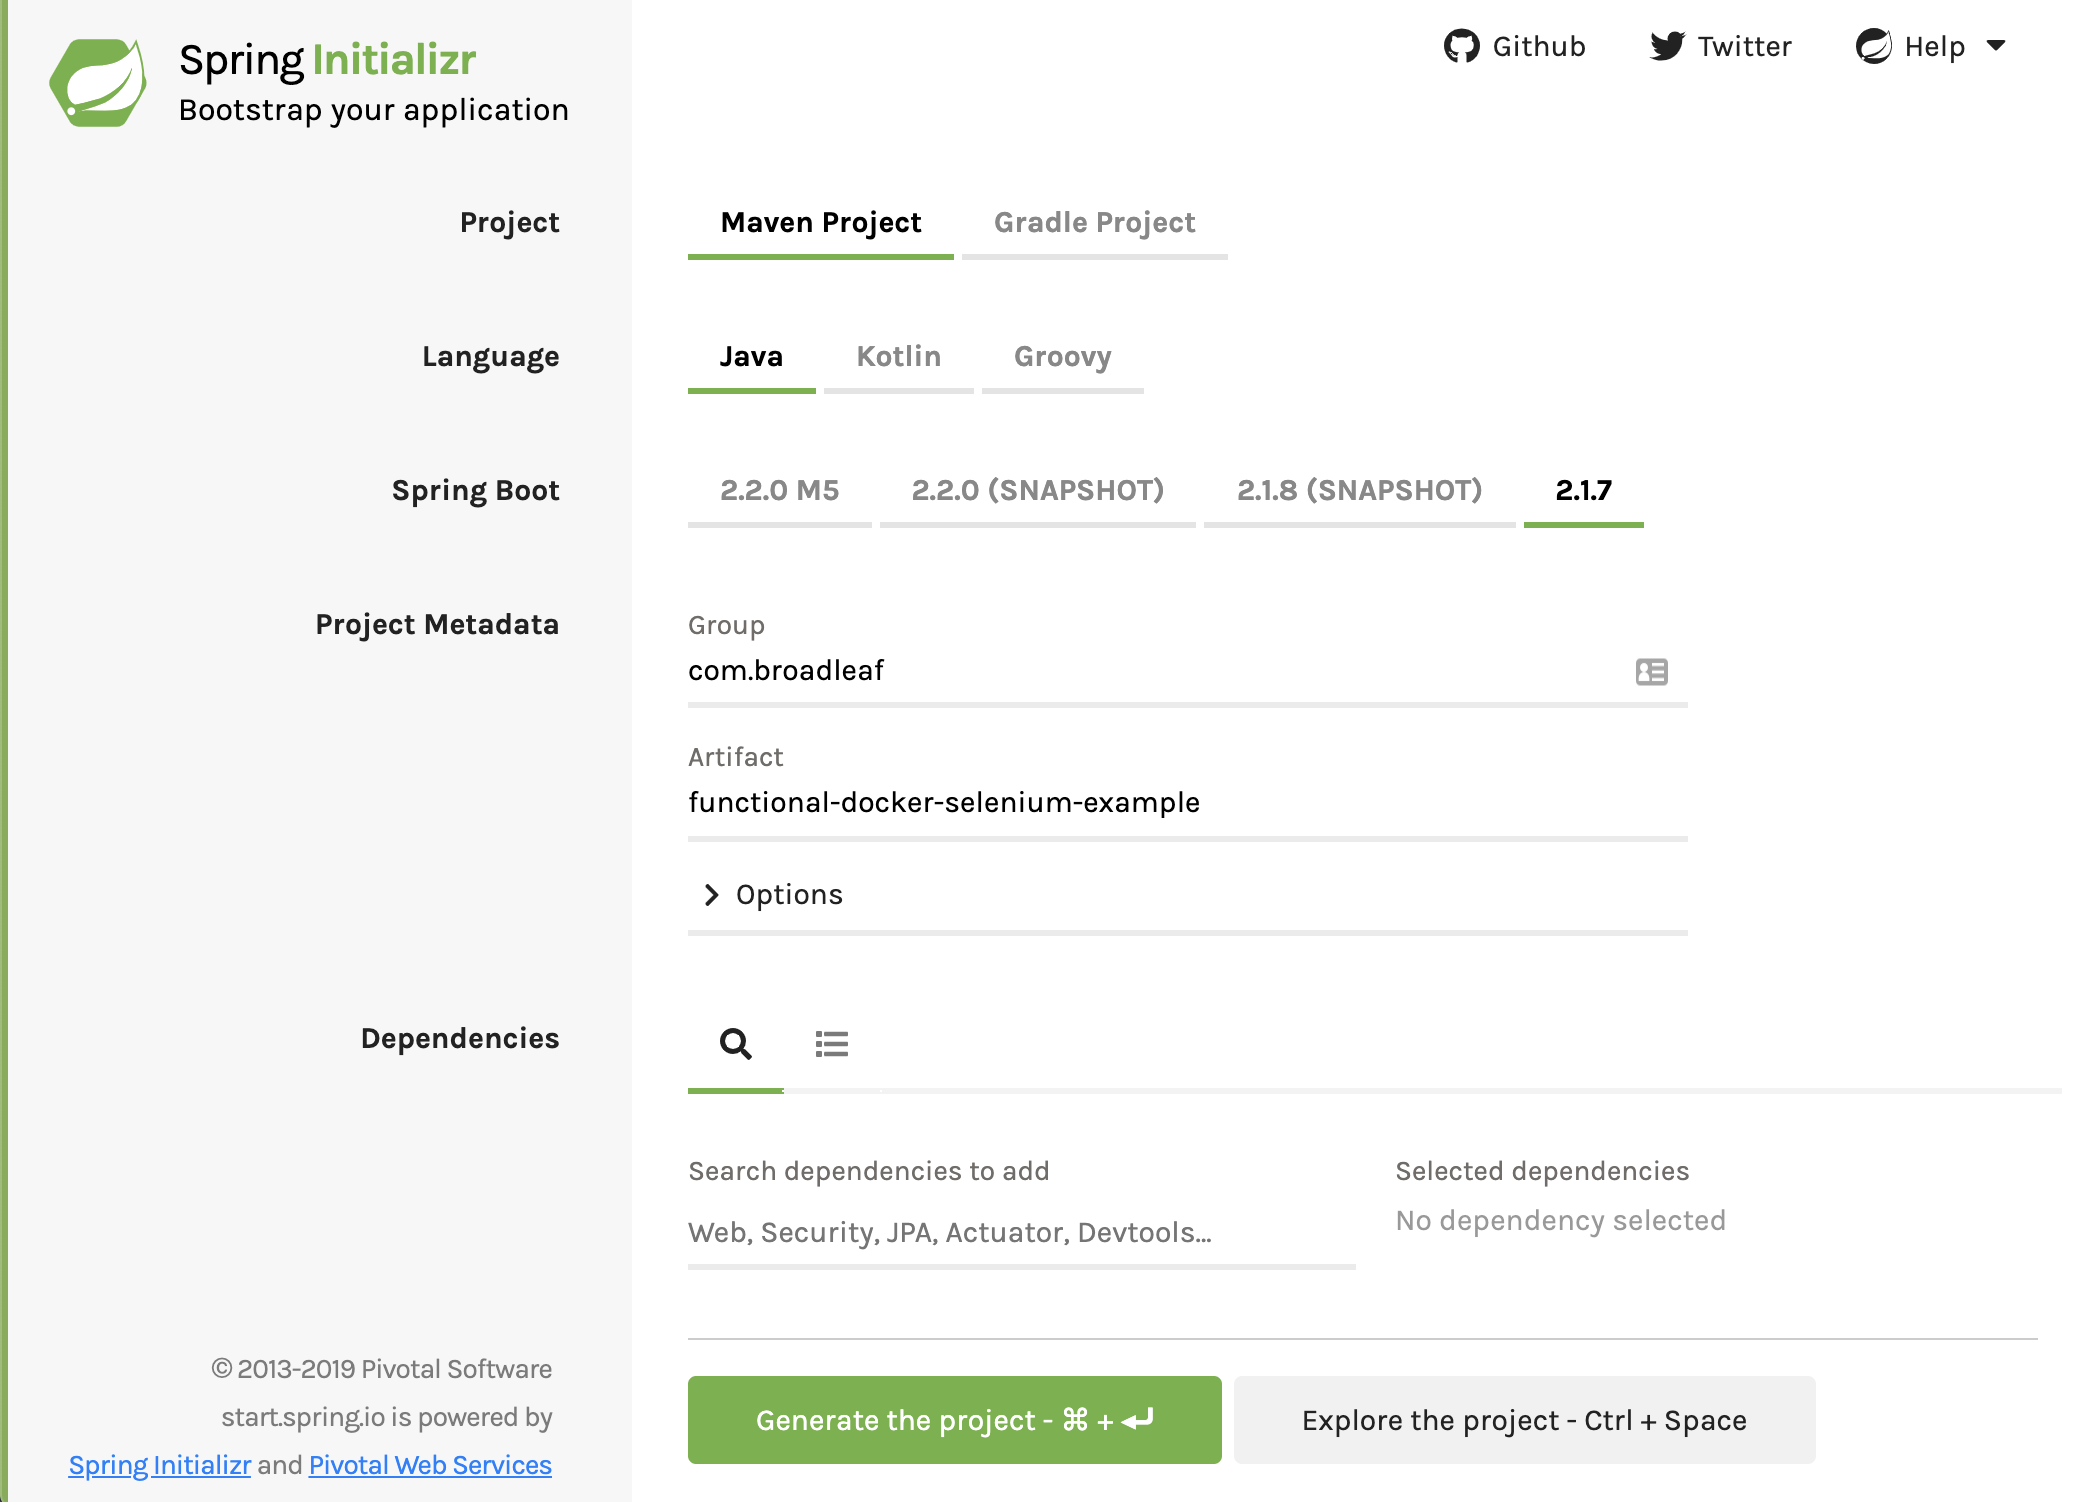
Once you have it generated, go ahead and import the project into your preferred IDE. Open up the main maven pom.xml file and add the following additional dependencies:
Configure a TestContainers JUnit Test
The purpose of this test class is to facilitate testing UI functionality that is provided by one or more Docker containers. So, open up the stubbed out Spring Boot Test that was created for you. In our case it was called FunctionalDockerSeleniumExampleApplicationTests which is located in the /src/test/java/com/broadleaf/functionaldockerseleniumexample directory.
I’ll first post the code for the entire test case and then go through each section in detail below it.
Setting up a Network
Setup a Network so that the docker containers can “talk” to each other. In our scenario we have a wordpress container that needs to talk to a MySQL instance, and a selenium driver instance that needs to talk to the Wordpress container.
Setting up a MySQL GenericContainer
This container is needed for Wordpress to function properly. Take note that we defined the network alias as “mySQL” which I’ll explain in the next section, and we also associate this with the “network” defined above. We’ll go ahead and insert some default environment variable values that are specified in the Docker Wordpress getting started guides.
Setting up a Wordpress GenericContainer
Setup the Wordpress Generic Container. As with the other container, associate this with the “network” defined above. Take note of the WORDPRESS_DB_HOST environment variable. We can take advantage of TestContainers network alias feature here to reference the other container by name. All the other environment variables are the defaults specified in Docker Wordpress’s starting guides. In addition, notice we’re utilizing depends_on - which is a very useful TestContainers feature that allows us to specify the ordering of which containers should be started first.
Setting up a Selenium BrowserWebDriverContainer
Setup a Selenium Chrome container - This TestContainers container utilizes the docker selenium chrome standalone instance plus adds some really cool features on top like screen recording. You currently also have the ability to specify Firefox as a target browser as well. Notice we set up the screen recording to record all test cases and save the files into our target directory. You can configure it to record “just the passes” or “just the fails” if necessary.
Test Case Breakdown
- First create a selenium remote driver to connect to this chrome instance
- I’ve added some debug logging to help print out some helpful values to demonstrate how TestContainers “wires” everything up
- Specify a GET request to http://wordpress/ - the reason this works is because we set up network aliasing and the chrome browser in the TestContainer will be able to communicate to the Wordpress container running on port 80
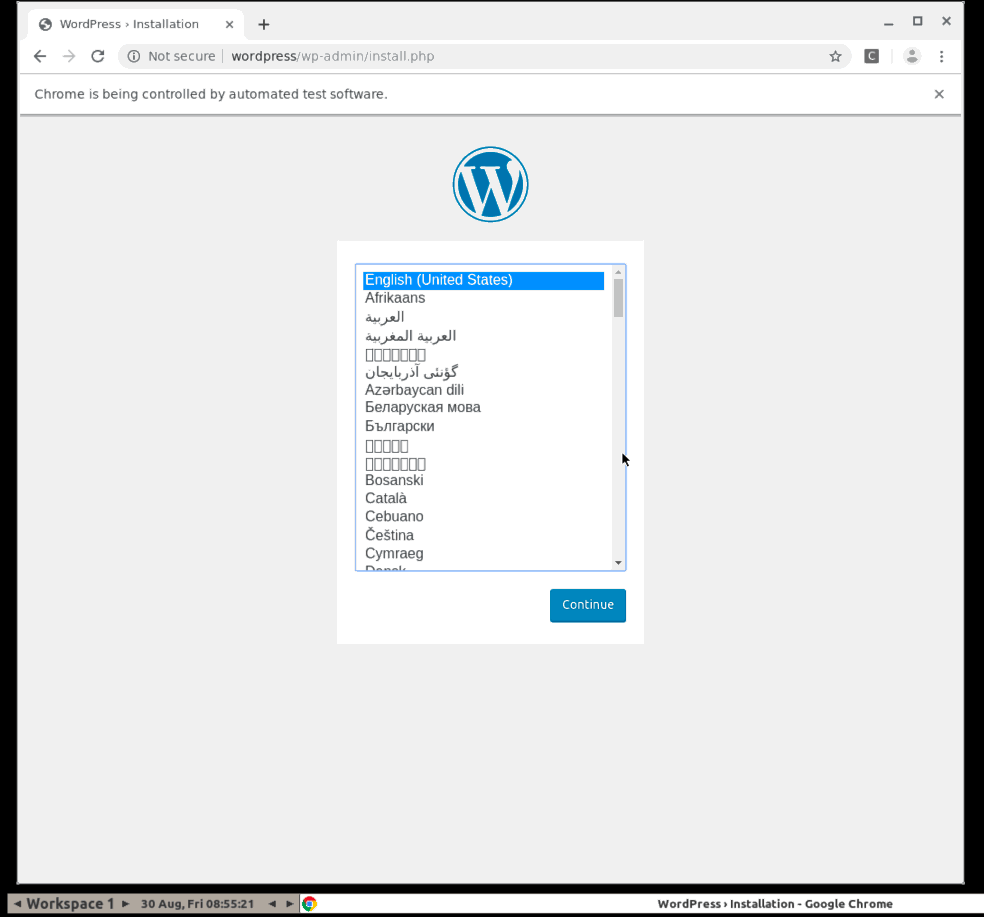
- Specify your test criteria - for this specific example we’ll just demonstrate a simple example that clicks through the installation language selector, gets to step 2, and clicks submit without filling out any form. This test should surface an error message saying that a username is required.
- Navigate to the directory that contains your Spring Boot Testing Harness and execute your test by running ./mvnw test to start the test phase of Maven’s build lifecycle. (you can use “mvn test” if you already have Maven installed locally)
Note: after running your test, you’ll want to make sure to clean up any remaining docker processes that may still be running. E.g. `docker ps` and `docker stop XXXXXX`
If all goes well, you should have an .FLV video file in your /target directory that looks like below. Note: you may need something like VLC Media Player to open and play these files if you don’t have a compatible player on your OS already.
Conclusion
In this simple exercise, we’ve demonstrated how to utilize the TestContainers framework to perform black box acceptance testing for containerized applications. If your team is working in a containerized environment, TestContainers is a great library worth checking out. This library has the potential to provide some very exciting and new testing capabilities that are definitely worth considering (especially around integration within your continuous delivery pipeline).
