Last time, we introduced the new advanced product types. This time we’ll see how to create our first standard product, setting the stage to learn more about them and the various ways to merchandise them. We’ll be working in the Broadleaf admin console and checking our progress on our sample storefront. If you missed the previous post and want to get caught up, check out our Advanced Products Overview.
If you want to follow along, you can sign up for a free demo environment. Simply fill out the form and check your email with instructions on accessing your environment.
Before we begin
Let’s start with a recap of what a Standard product represents within Broadleaf. This type of product is a simple sellable good that doesn’t have any variations. These products have a single SKU code that can be priced and tracked in inventory. Like all products, they also allow defining an SEO friendly URL, description, and related meta-info.
Despite standard products not having variations, they may still be customized or added onto at the time of purchase. Each product type allows for the inclusion of “add-ons.” Add-ons come in two varieties:
They can be other products such as an extended warranty.
They can be customer-supplied data that is relevant to the product they’re purchasing. An example of this would be allowing a customer to enter some kind of personalized text for the back of a t-shirt. The difference between these and other options would be that they do not impact the SKU.
While this topic is out of scope for the purpose of this post, I wanted to be clear that these products may be “simple,” but they are also extremely powerful. We plan to cover these ideas in the near future, so watch this space.
Let’s get started
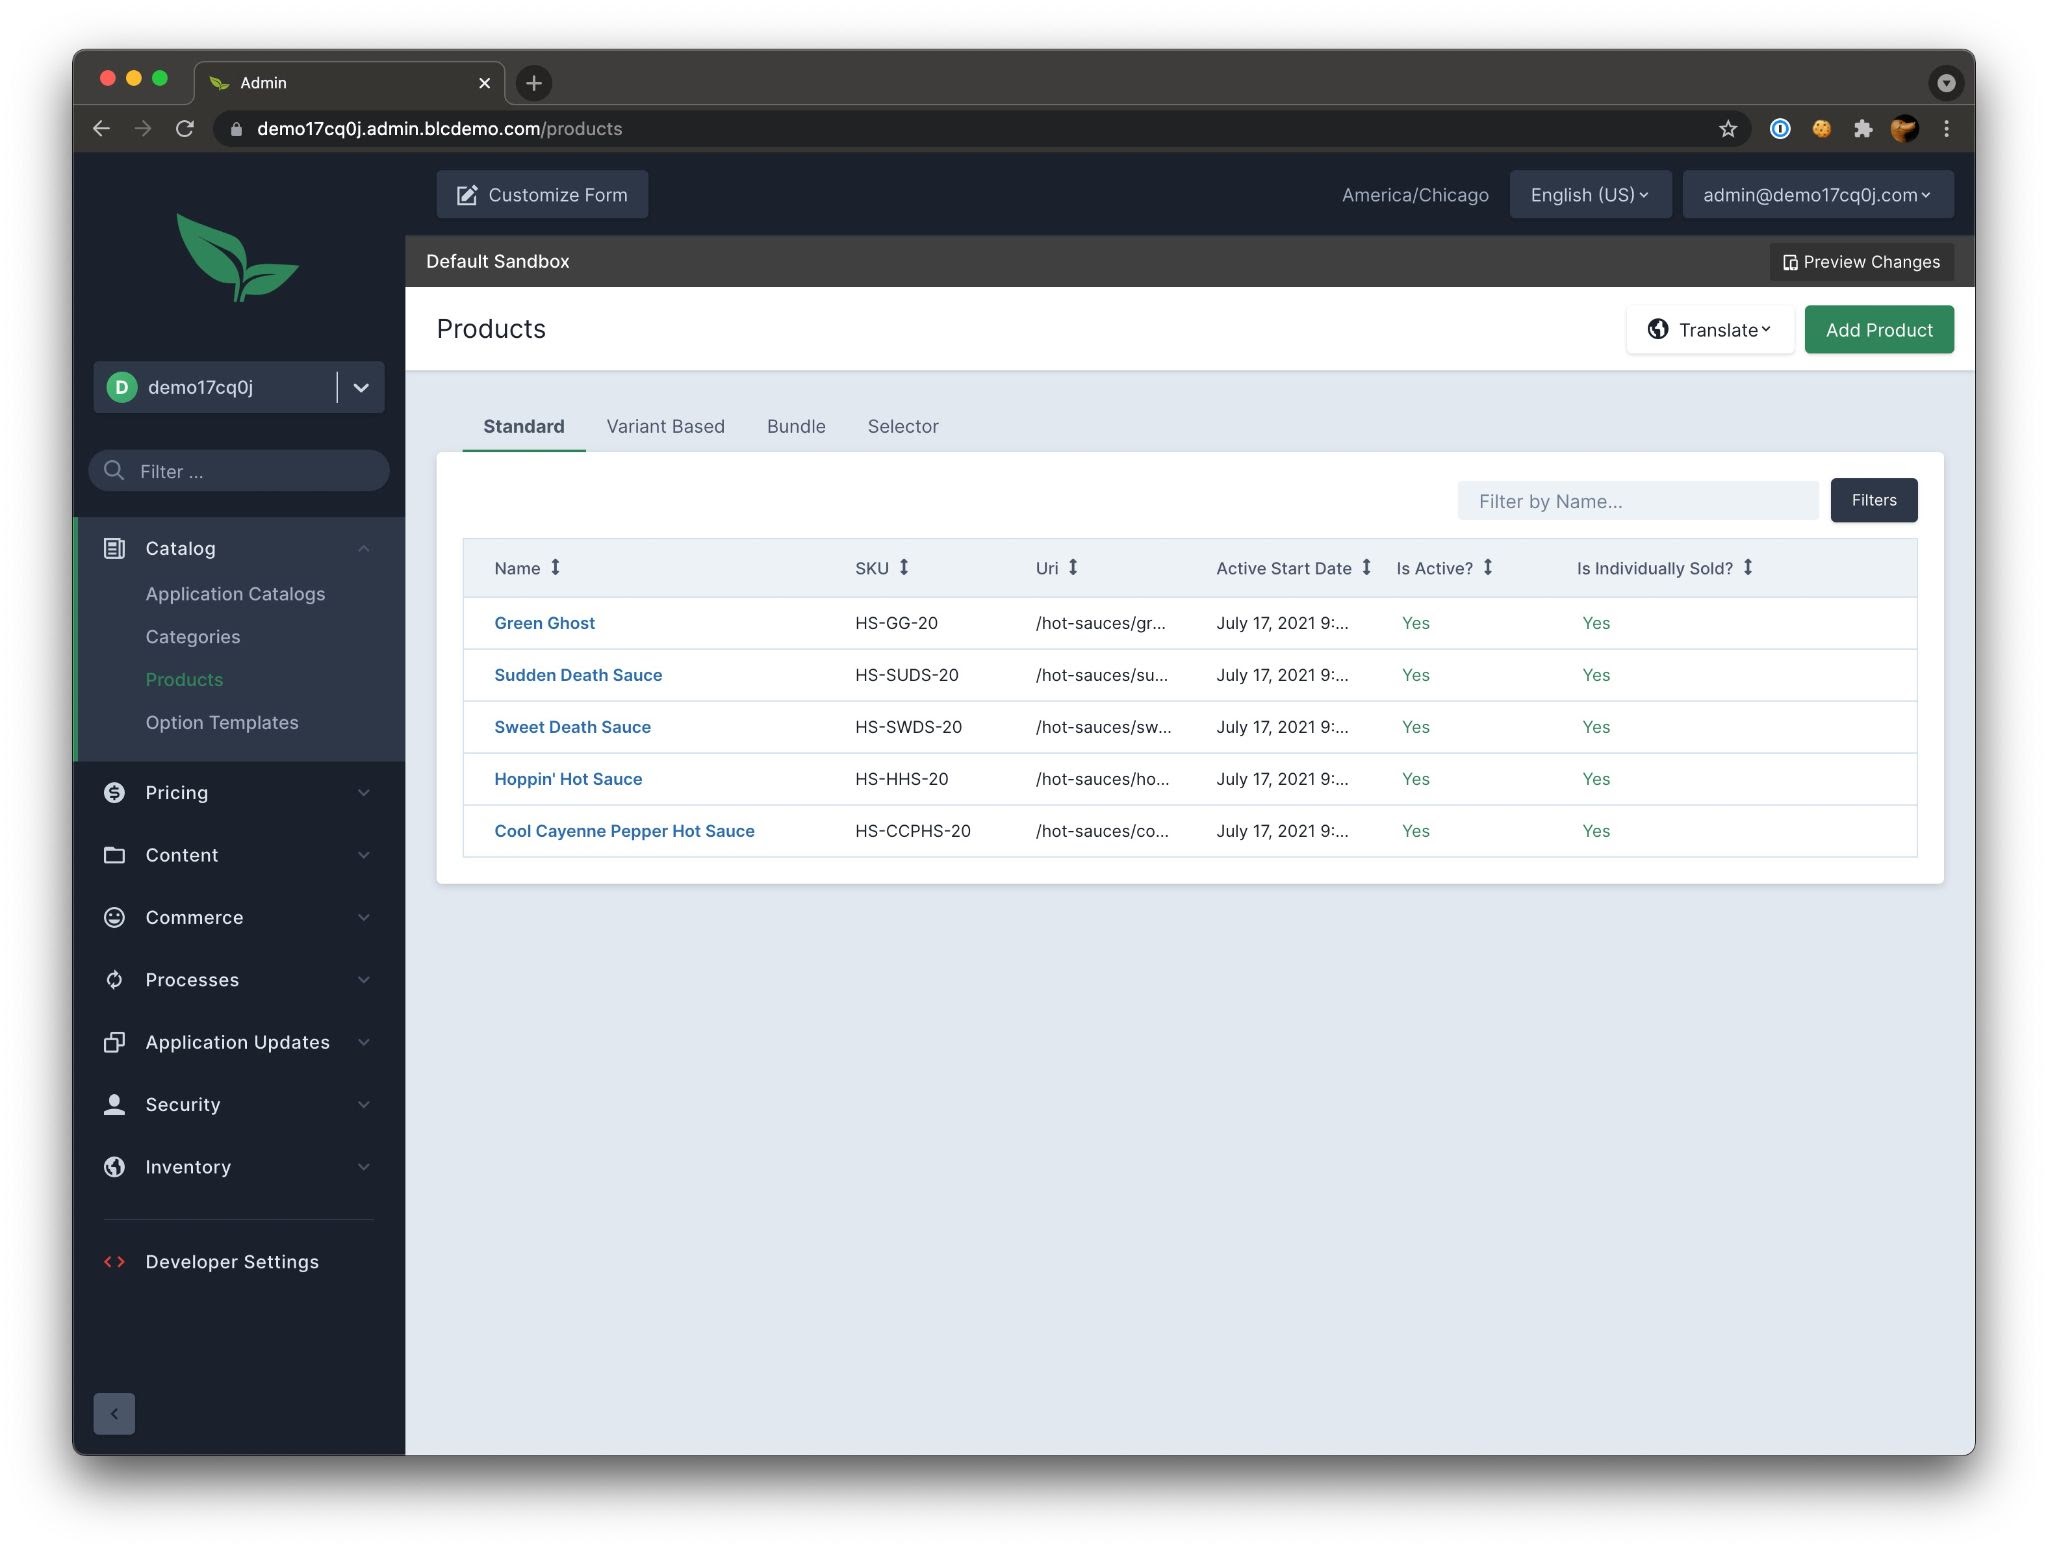
To restate our goal for this post, we want to create a new standard product from scratch and be able to view it on our sample storefront. We’ll start by logging into the Broadleaf admin console and navigating to the products screen.
The screenshot above shows all the products that are currently in the system. Our demo site is a hot sauce store, so all the products are in that theme. You’ll notice the tabs across the top of the list, this is how we can manage the different types of products we’re selling. For now, we’ll leave the “Standard” tab selected and click “Add Product.”
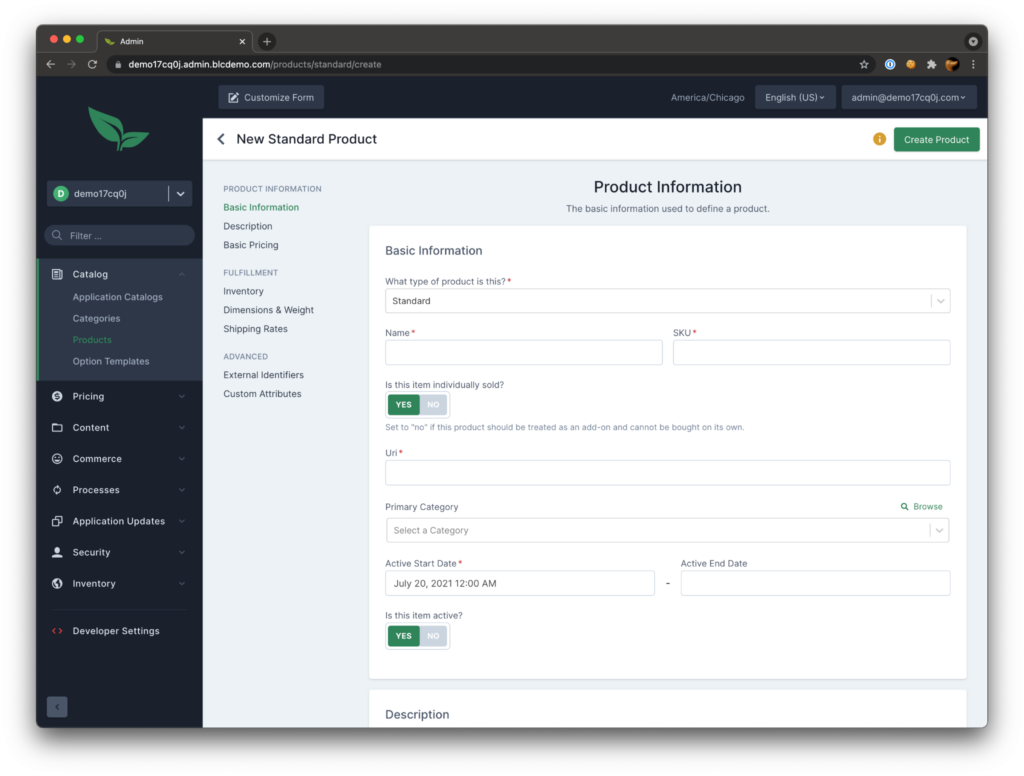
This navigates us to our product creation form. Take some time to explore the different fields available. For now, we’ll fill in just the required fields of Name, SKU, and Default Price and click the “Create Product” button. I’m going with the following:
Name: “Demo Hot Sauce”
SKU: “DEMO-HS”
Default Price: “10.99”
Take note of how the URI is automatically generated based on the name. You can also manually enter this in. Spaces will be converted into hyphens as this needs to be a valid browse location. By default, we also enforce system-wide uniqueness for product URIs so there are no conflicts when fetching them on the storefront.
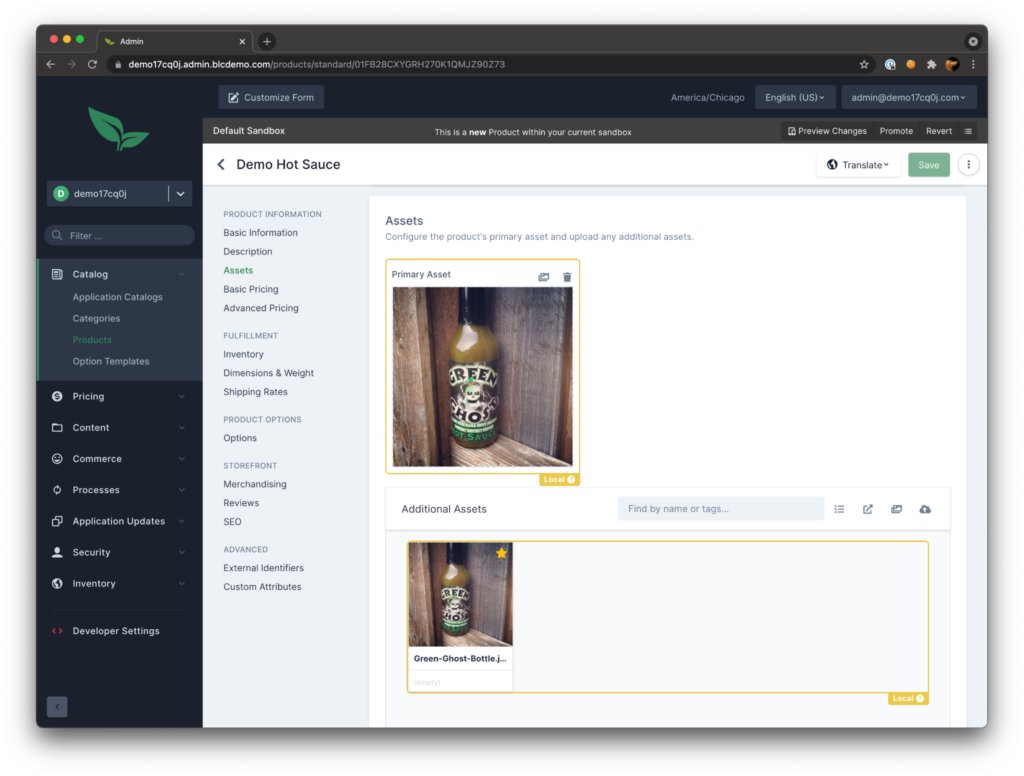
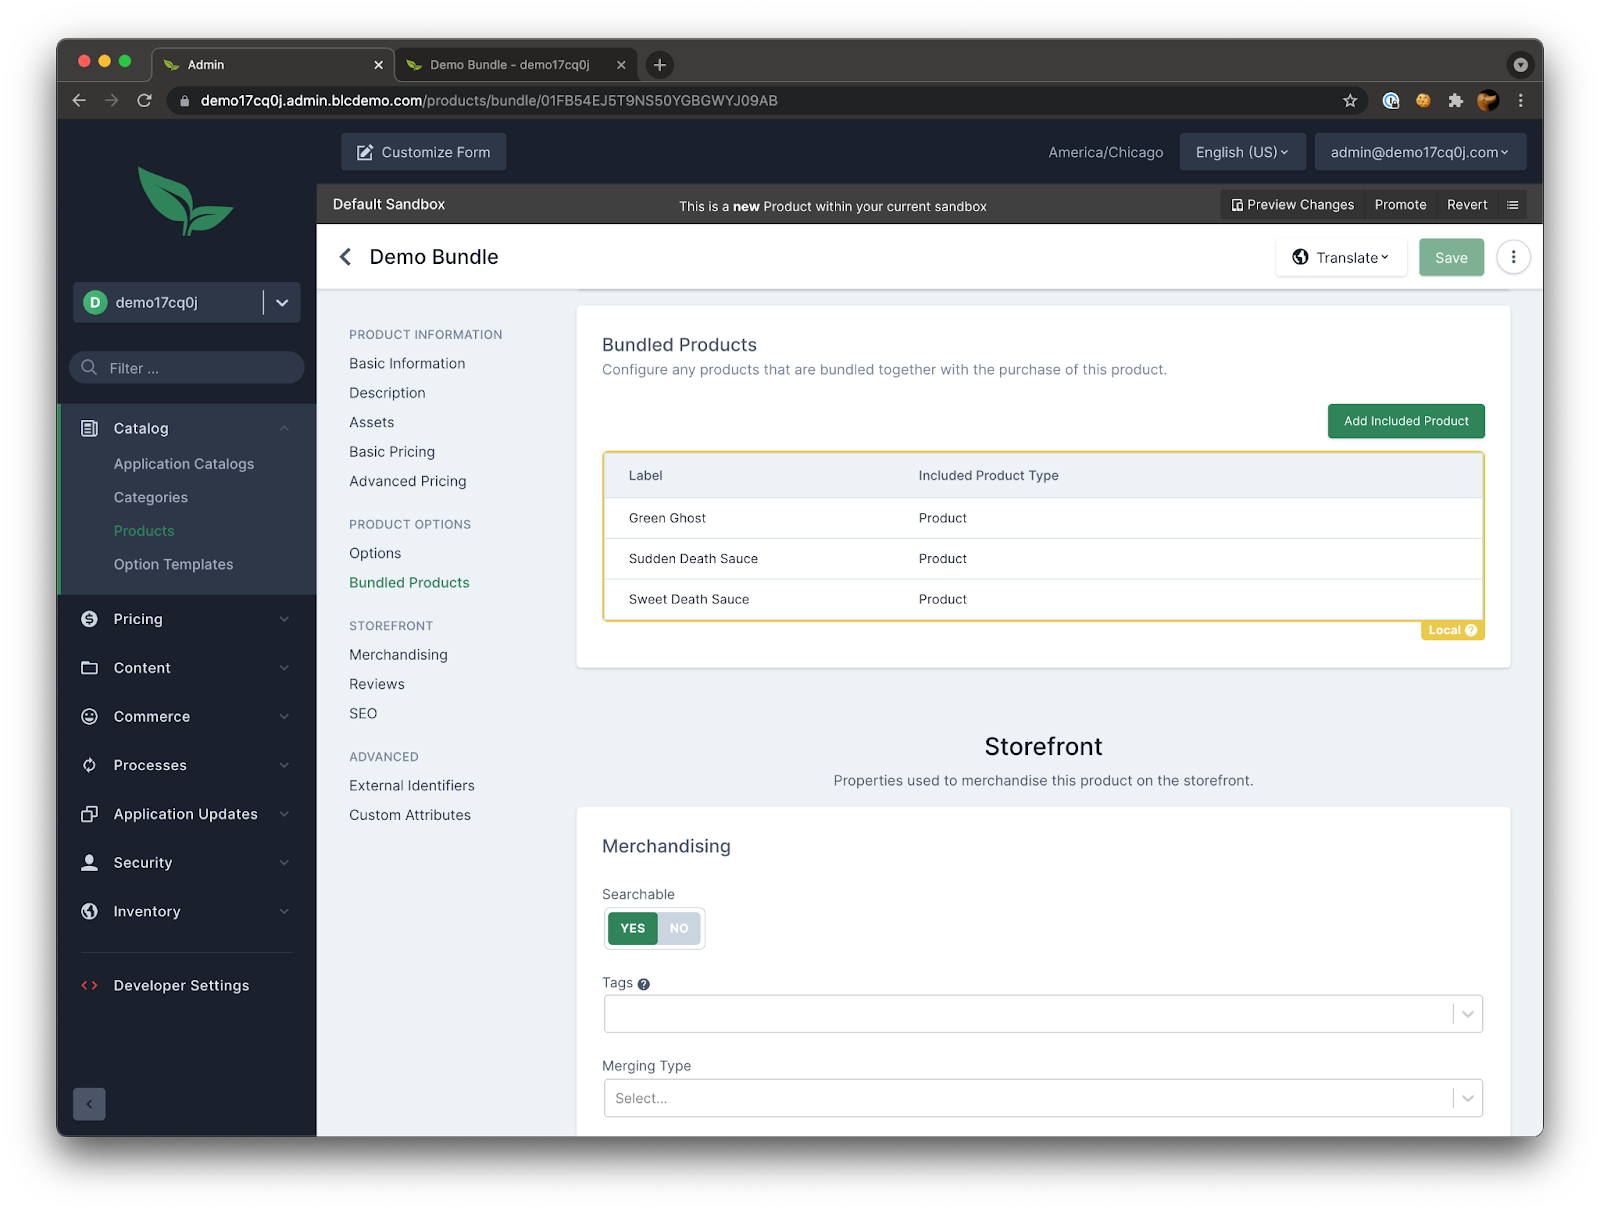
Once the page loads, we have access to many more fields to further customize our product. In order to really see how our product will look on the storefront, we’ll want to add at least one asset. We’ll select “Assets” from the navigation and choose a Primary Asset. I’m using one of the assets currently in the system for simplicity but feel free to upload your own image.
Now that we have all the basic information for our product we can see what it looks like on the storefront. Make sure to click the save button in case you’ve made any changes, then find the “Preview Changes” button on the ribbon right above it.
This should open a new tab in your browser and you should see something like the following:
Congratulations, you’ve created your first standard product!
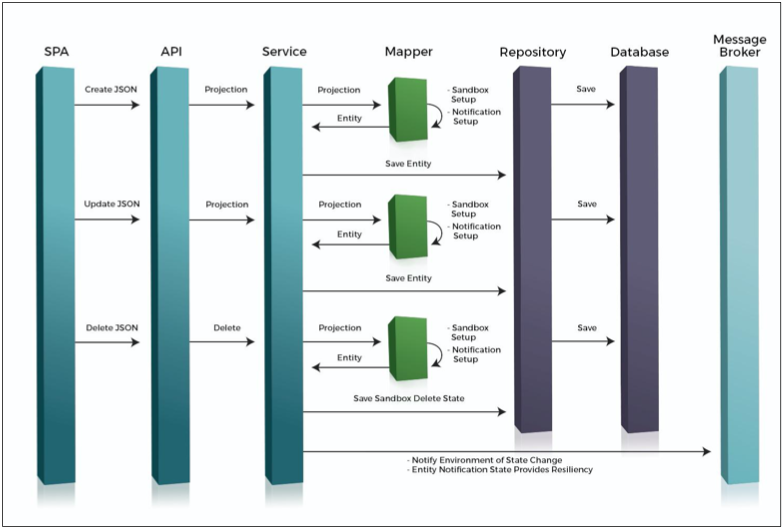
If you look closely, you’ll notice that we’re in “preview mode.” Whenever we make a change in the admin, we’re working in a “sandbox.” These changes can be previewed as we just saw and can be staged for deployment at a later time. This means that our new product isn’t actually live on the site. If we were to exit preview mode, we wouldn’t be able to find it. Let’s go back to the admin and deploy our product to production.
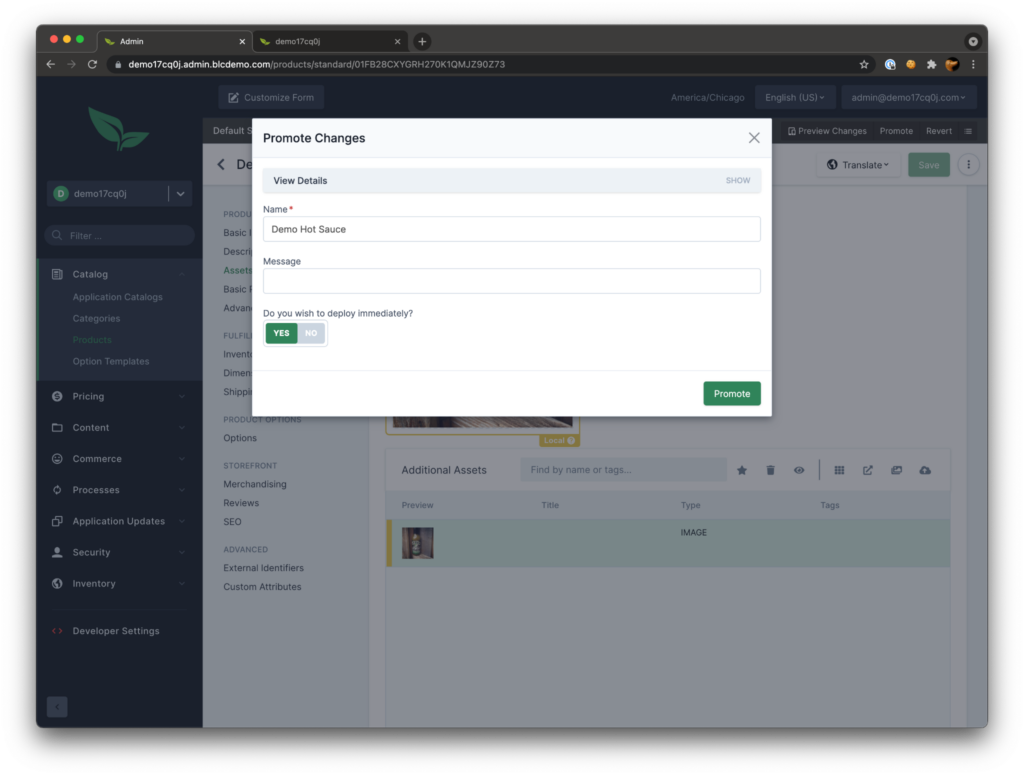
Find the “Promote” button next to the preview button we clicked last time. Clicking this will bring up a popup allowing us to push up our changes.
We’ll make sure to select the option to “deploy immediately” so that our changes go straight to production. And, we’re done!
Where to go from here
Now that we have our product showing up on the storefront we’re ready to dig in a bit more and see how to merchandise it to our customers. In a future post, we’ll take a look at the various ways to handle pricing for our new product. We’ll also continue looking at the remaining product types. Stay tuned.